Note - The permission levels required and how to access map editor instructions are in the previous lessons or click here - How to Access Map Editor, Understanding Map Versions & Naming Map Version
Do Not Draw On Top Of Existing Paddock
- Unfortunately, you cannot simply create a new paddock on top of an existing paddock.
- This is due to the overlap feature, if more than 1% of a paddock overlaps with another paddock, you will receive validation errors when you try to validate and save changes to publish your map.
- There is a two step process to split a paddock. First you need to edit the existing paddock to reduce it's boundary, and then create a new paddock in that space. We will explain further below.
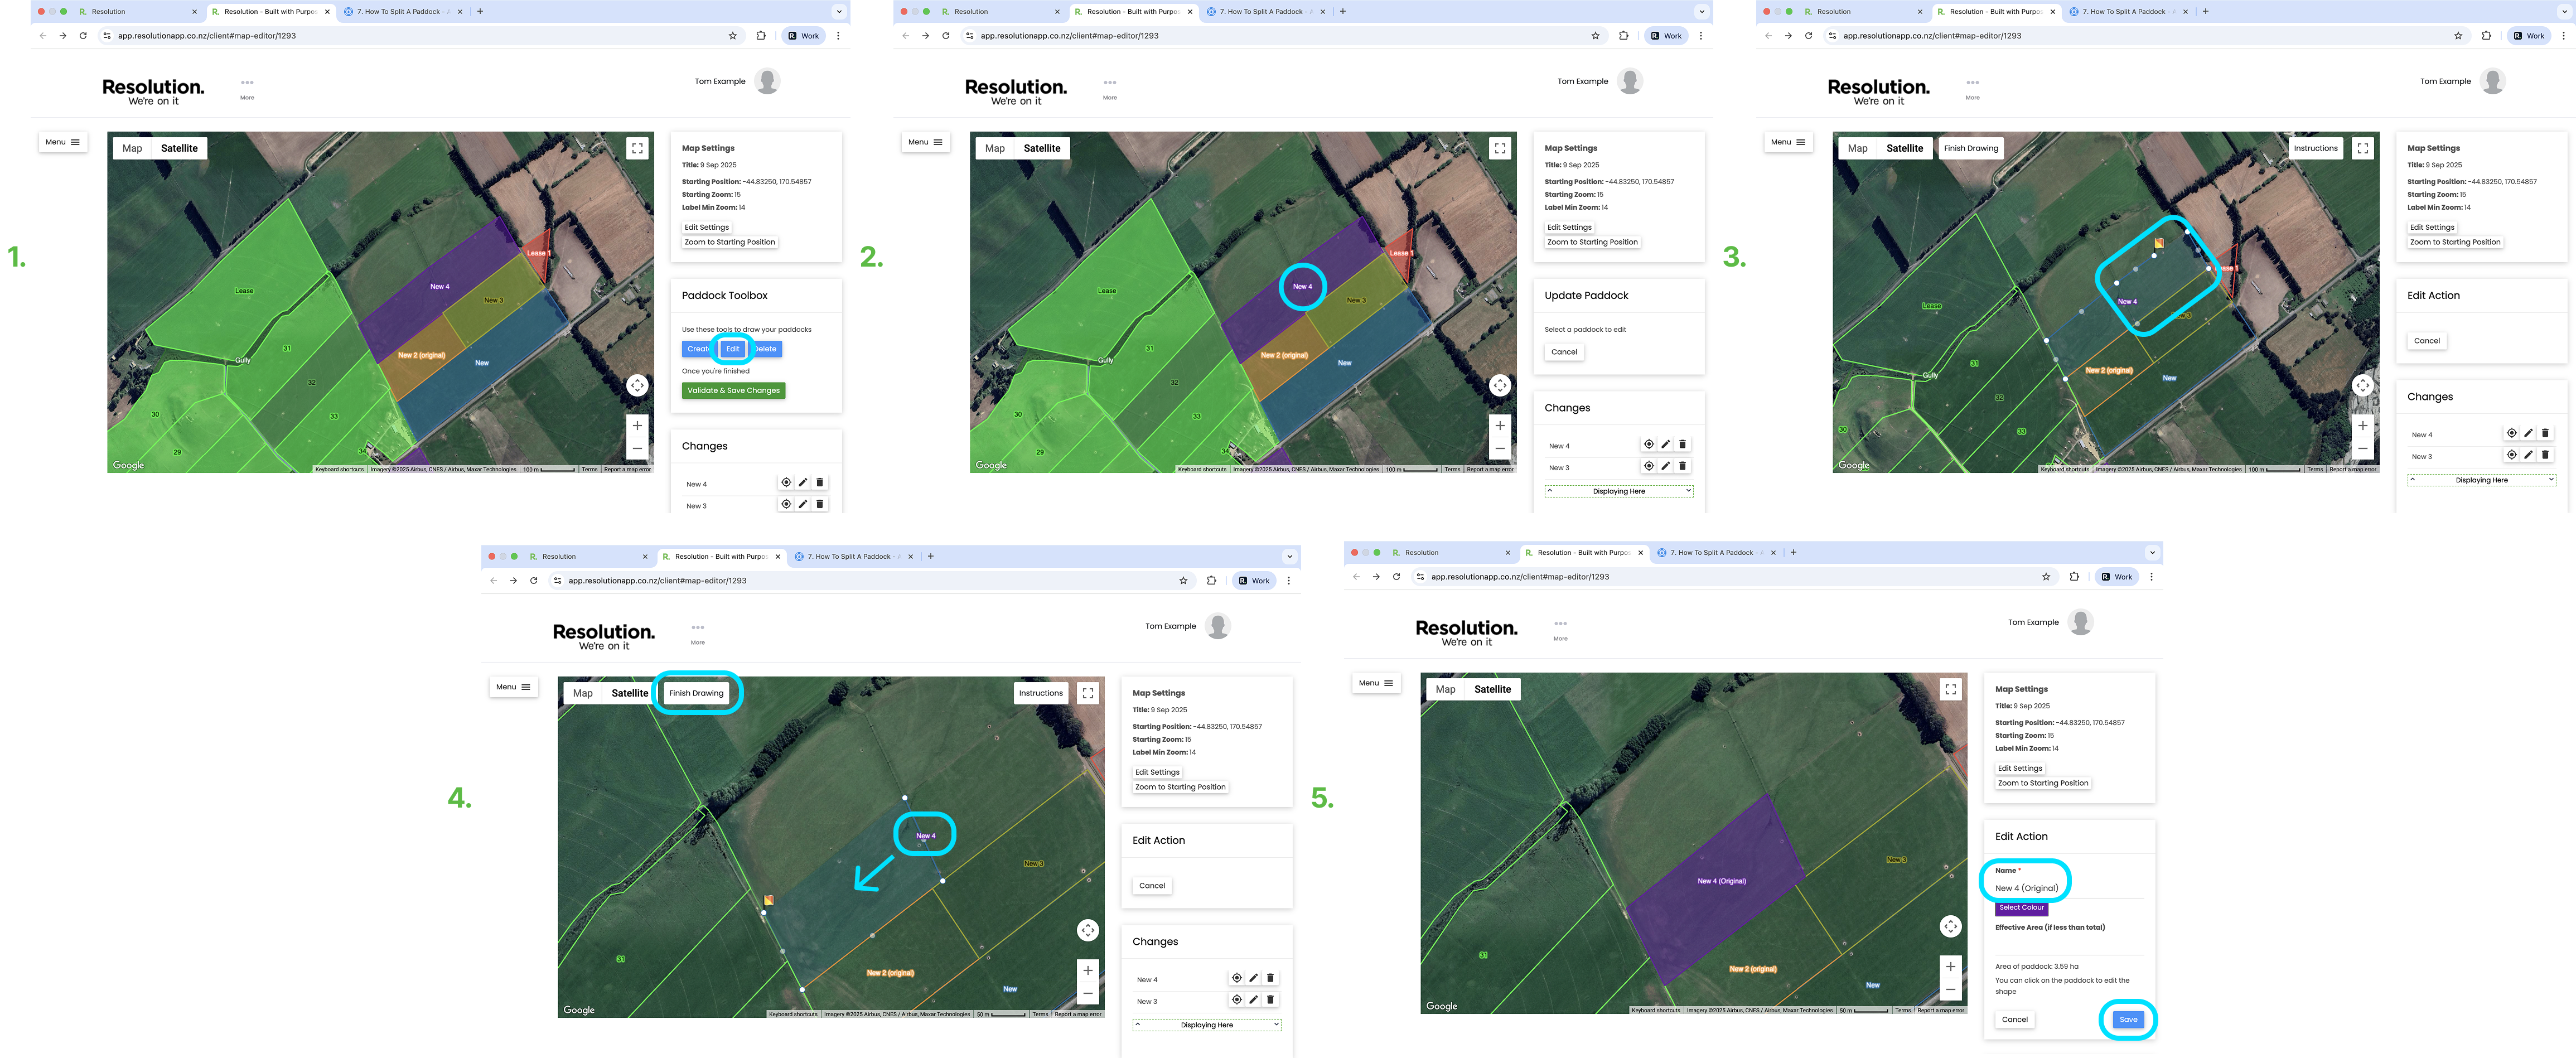
Step 1. Edit Existing Paddock
- From the Paddock Toolbox window on the right of the screen - Select ‘Edit’
- Select the paddock you wish to split.
- Left click: Left click on the map to add new points to your new paddock. Or, left click or click and drag the smaller points in between the main points to add a new point.
- Shift key (On Windows and Apple): Hold down the shift key to snap to the nearest corner and left click at the same time to set a point there.
- Control key (on Windows) or Command key (on Apple): Hold down the control/command key to snap to the paddock boundary line and left click at the same time to set a point there.
- Right click: Right clicking a point will delete that point.
- Click and drag: To move a point, click and drag it into a new position. Using the tools available (instructions tab), move the points of the paddock to make the paddock smaller, with the new boundary line where you want the ‘split’ to be.
- Click and drag the paddock label back into the newly edited paddock boundaries.
- Select ‘Finish Drawing’.
- Edit the paddock name, colour and effective area. I kept the paddock name the same but added ‘Original’.
- Select ‘Save’.
- This will not affect any existing records attached to the previous version of this paddock. Once you validate and save these records will still be in the timeline and can still be found under the updated paddock name in the paddock filter option.
CAUTION - Avoid Overlap: Be sure to use the instructions tab and tools available (outlined above) to ensure there is no paddock overlap with an existing paddock. Resolution will allow up to a 1% overlap when you attempt to validate and save your changes, however for precision and accuracy we recommend having no overlaps.
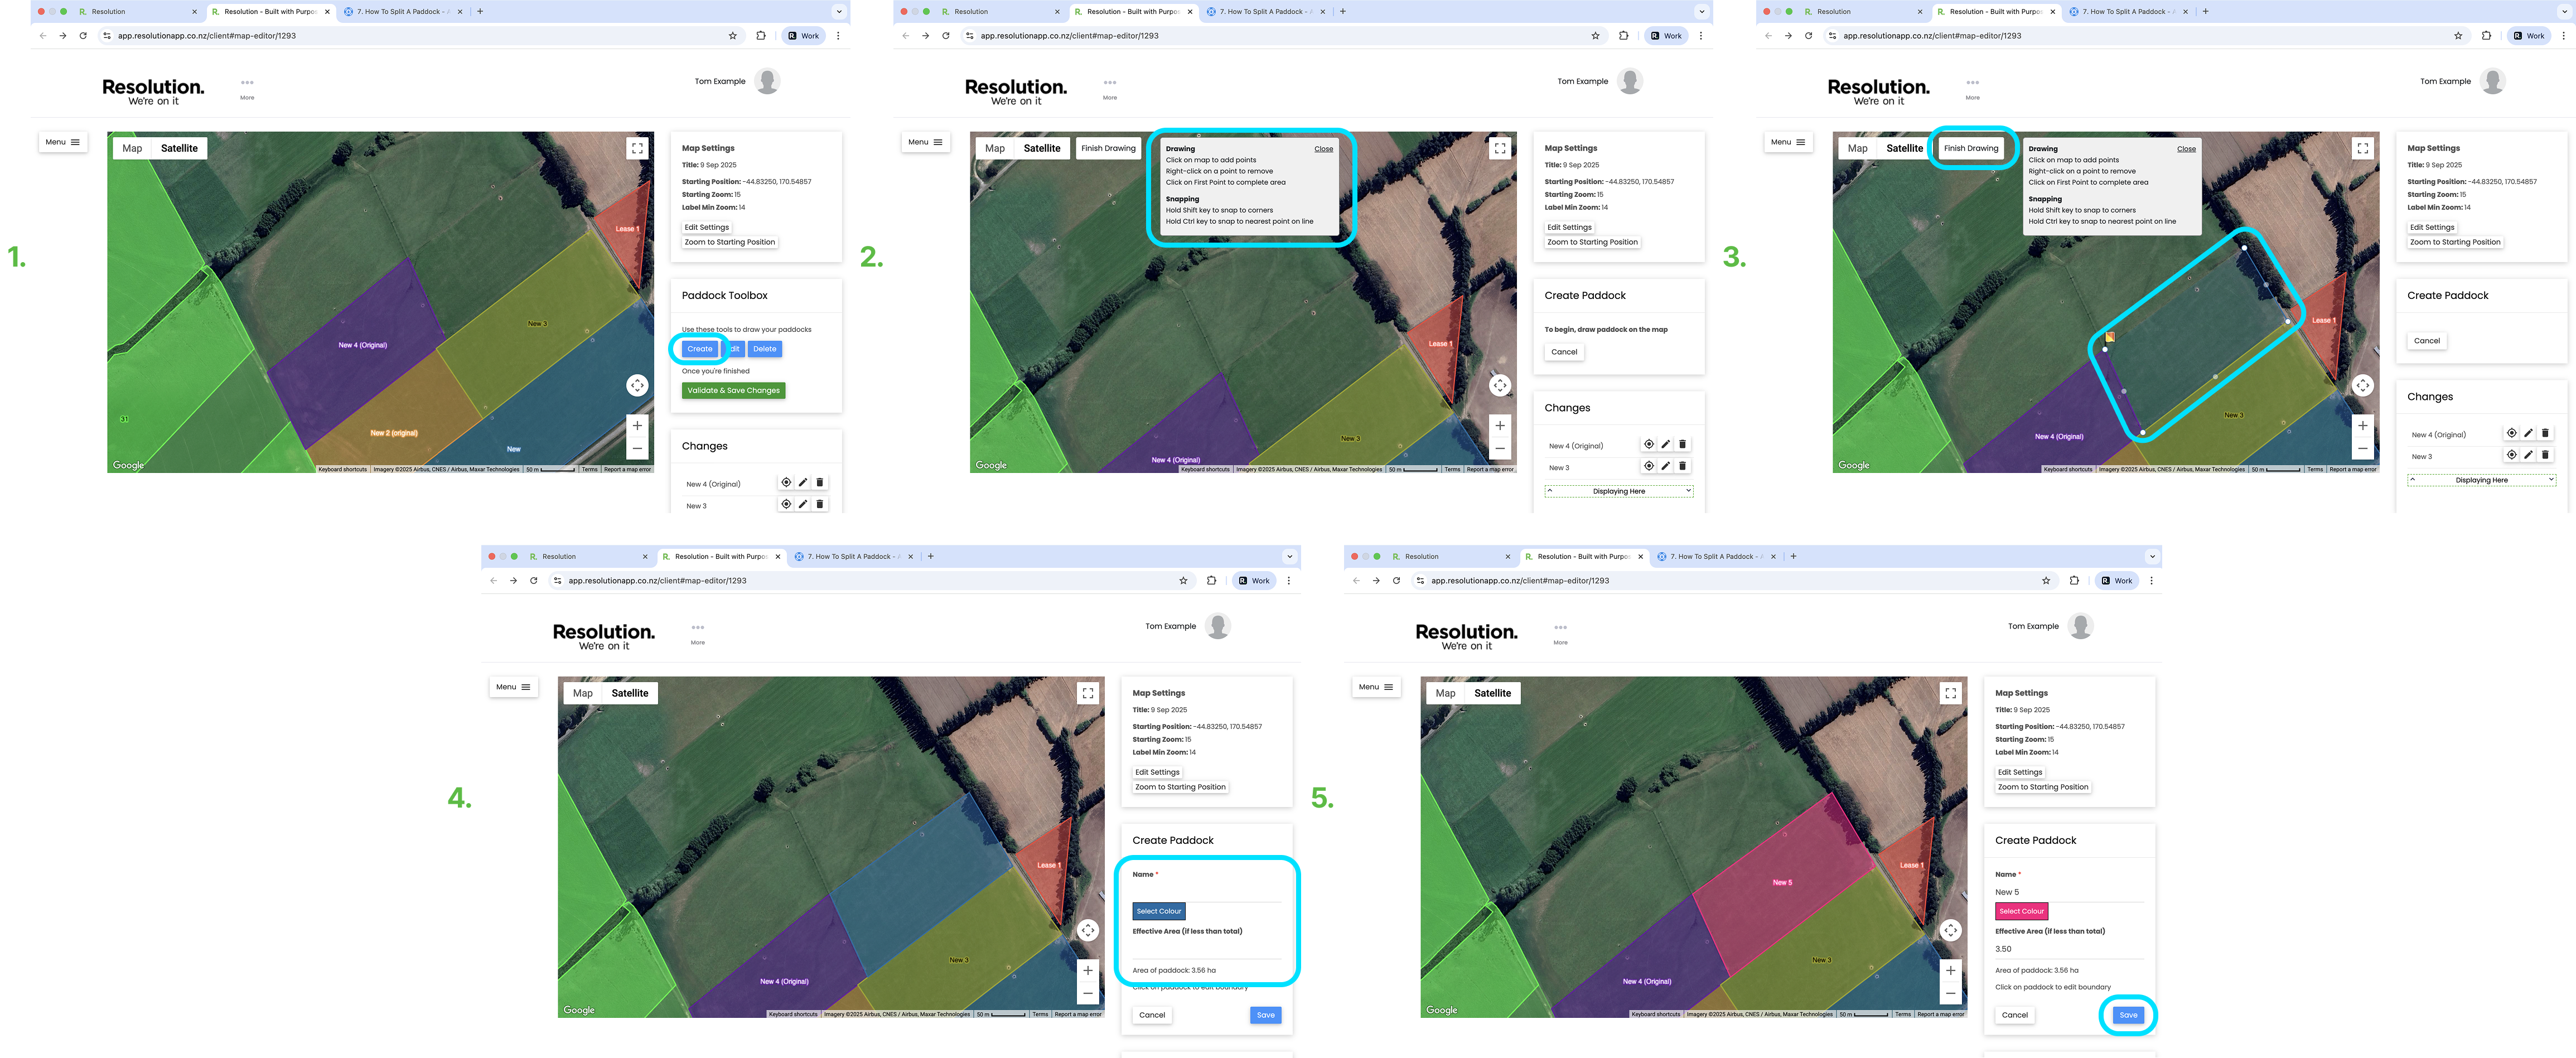
Step 2. Create New Paddock
- From the Paddock Toolbox window on the right of the screen - Select ‘Create’.
- Using the tools available (instructions tab), create a new paddock in the space made available from editing the paddock (outlined in detail in Step 1).
- To complete your paddock after mapping it out, either select your start point once more or select ‘Finish Drawing’.
- Give the paddock a name, colour and change the effective area if required.
- Select ‘Save’.
NOTE - The new paddock will not carry over any history from the original paddock that was split in step 1.
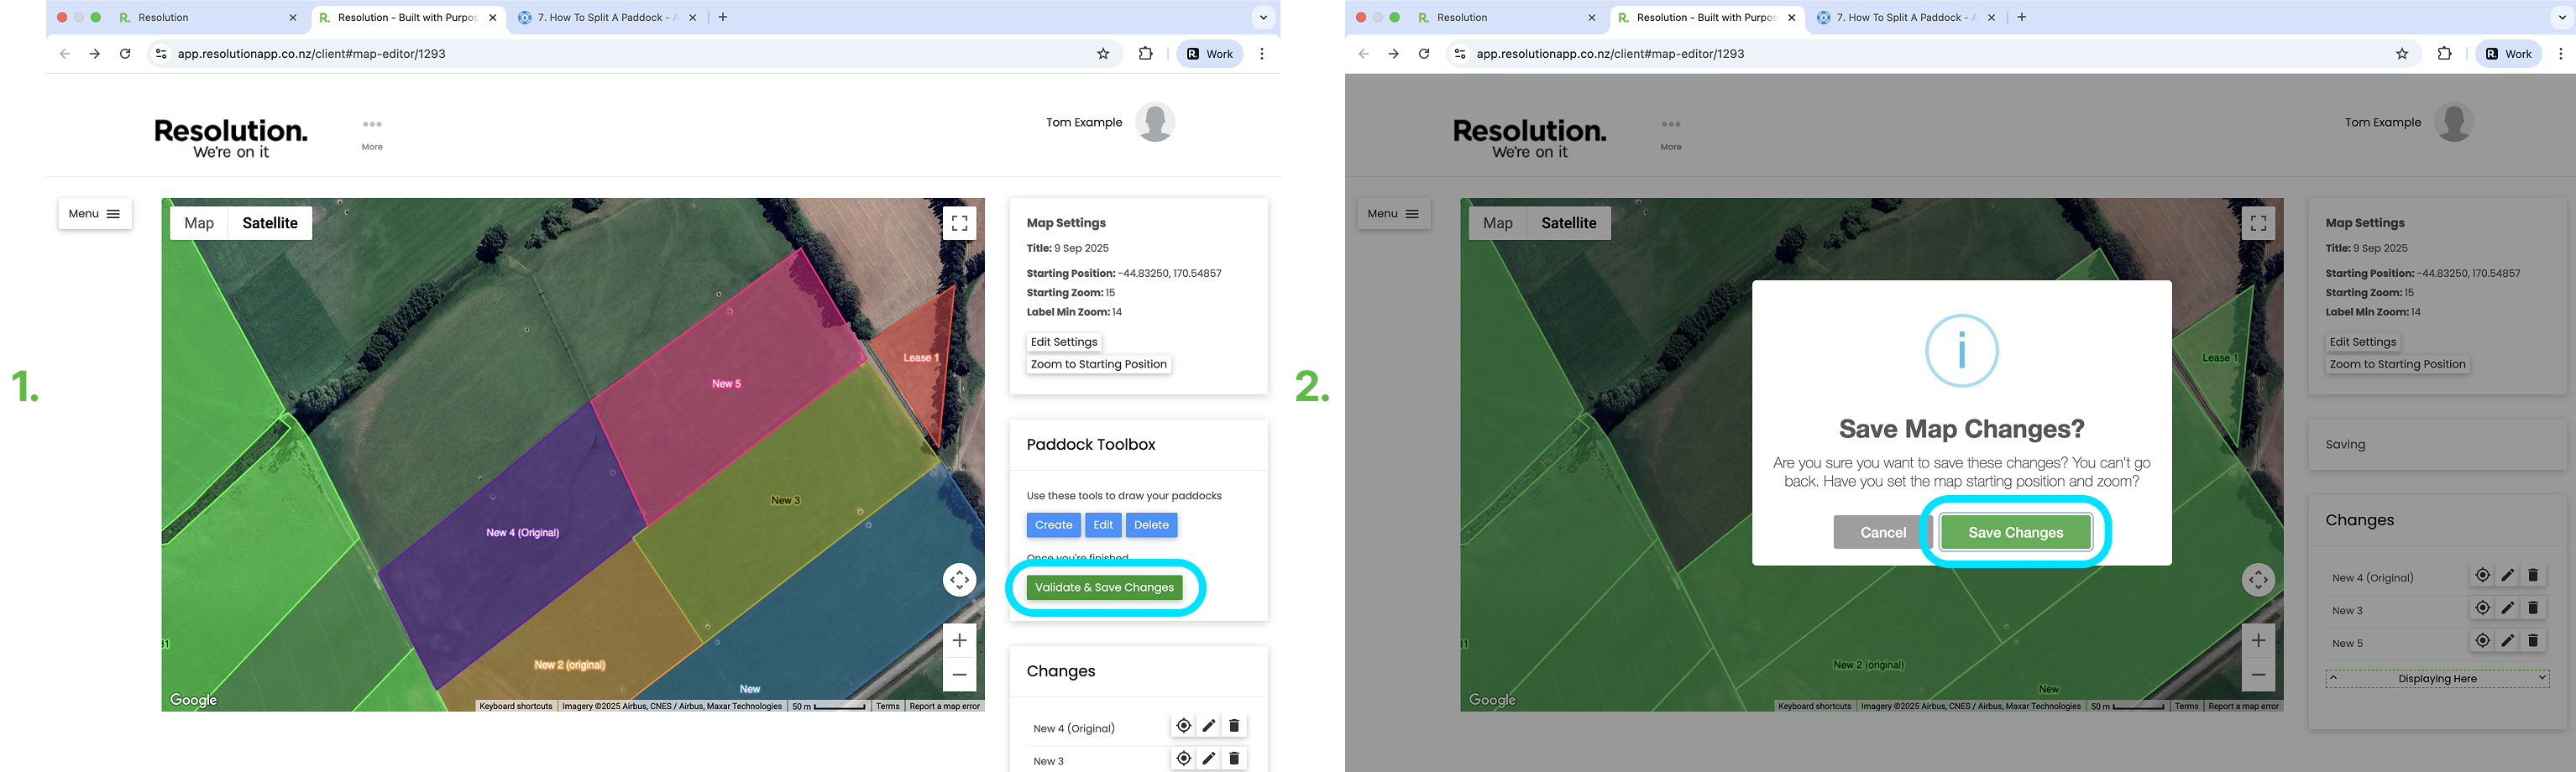
Validate And Save Changes
- After editing and creating your paddock, you need to validate and save your changes.
- Pro Tip: We recommend only validating and saving your changes made to the map once at the end, after all your changes have been made.
- To do so, select ‘Validate & Save Changes’.
- Select ‘Save Changes’ to confirm.
- Users will then need to sync the app for these changes to be visible.